Monday 24 June 2013

Project Life

So I decided to bite the bullet and have a go at Project life, typical me decides to give it a go a few months in but hey ho, I have caught up and rather pleased with it so far. It's more a month in review at the moment, as I didn't have enough photos for the past months, but I really wanted to start from January. 

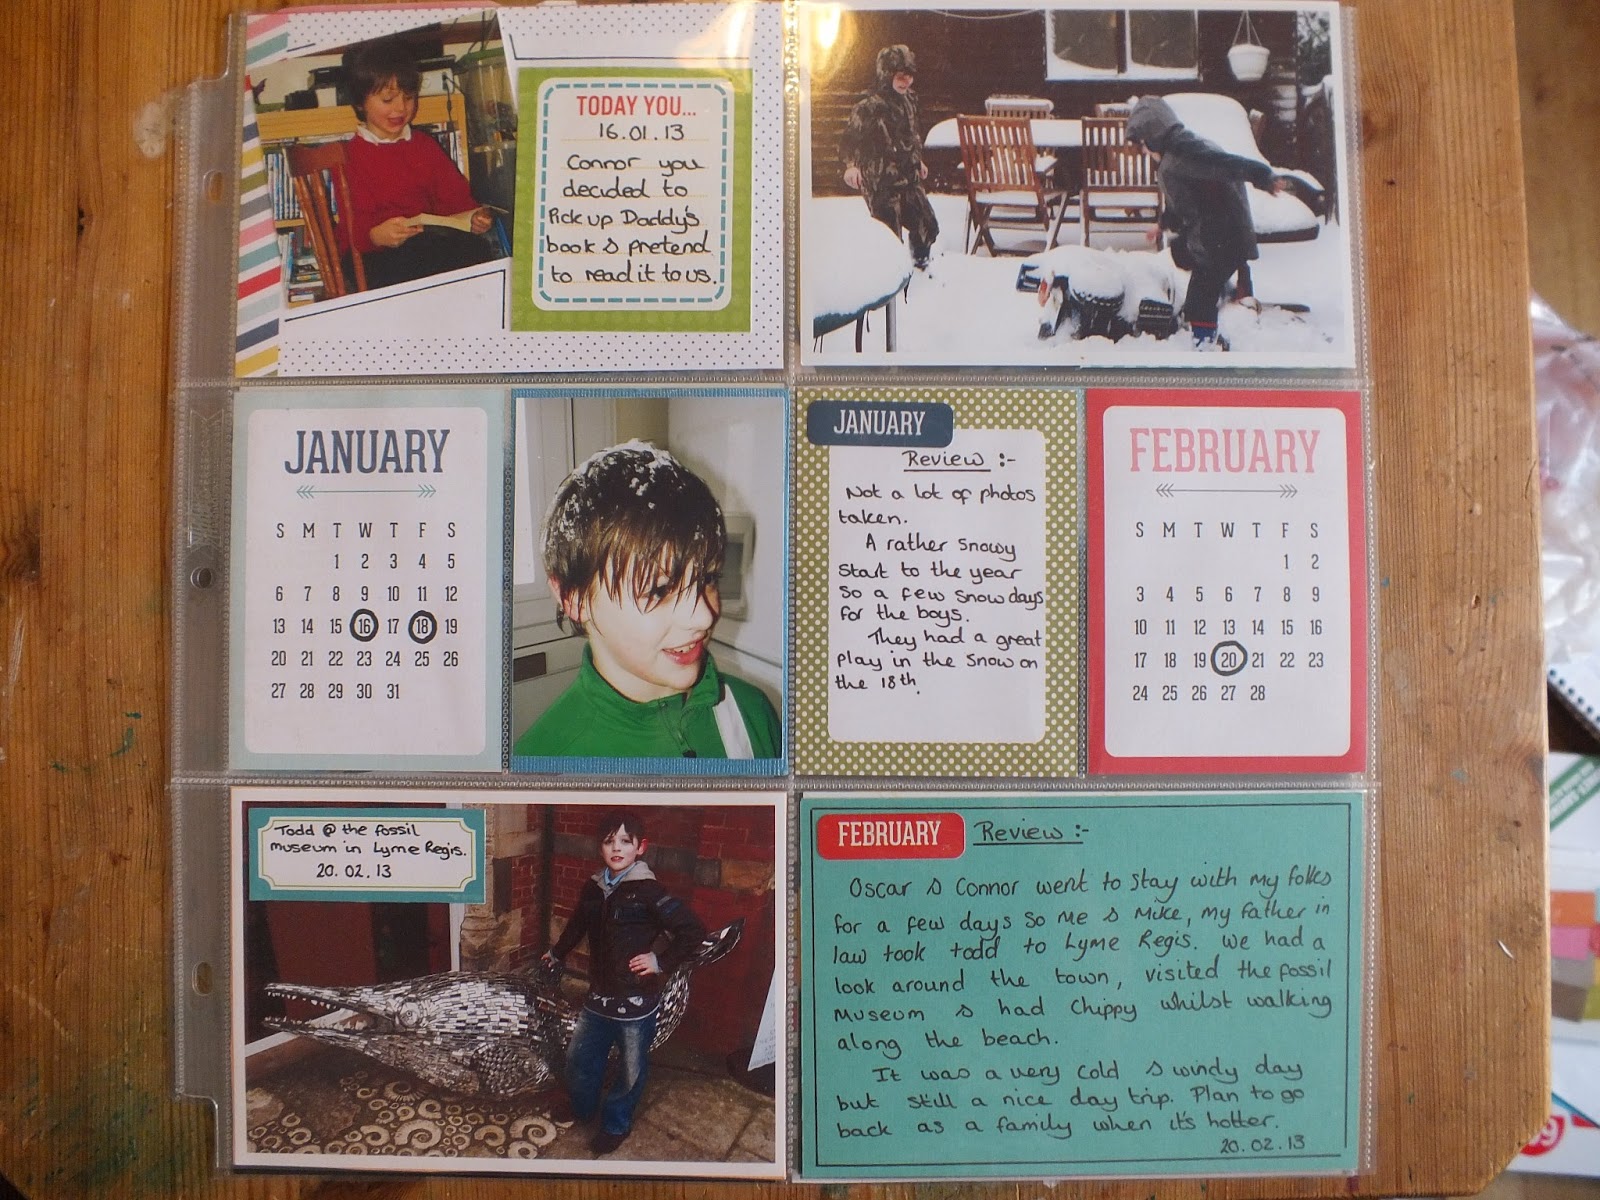
January & February 2013


March 2013


April 2013, Side one.


April 2013, Side 2.


May 2013

To create my Project Life so far I have been using Echo Parks Photo Freedom Kits - Volume 1 and Happy Go Lucky, Snap Stickers - Letters and Typeset and scraps of Card. 

I would love to know peoples thoughts :) 

Next up and last of all to share with you is my card I made for Hubby for his Birthday the other day. I have had this Digital Stamp Called Zombies on Parade, which was free, saved on my computer for a while now as had hoped to use it last yr but didn't get round to it. So this yr I finally put it to use. Hubby loves Zombies so figured it would be perfect. 

I used Bo Bunny's Whoo-Ligans Collection for the papers. 


And coloured the Stamp in using Promarkers

Skin - Emerald & Grass
Hair - Walnut, Cocoa, Terracotta
Gums - Pink Carnation
Man's Trousers - Azure & Cyan
Man's Top - Pumpkin & Amber
Girl's Skirt - Aegean & French Navy
Girls Top - Yellow, Poppy, Berry Read
Woman's Shoes - Honeycomb
Woman's Swim Suit - Magenta & Carmine
Baby's Nappy - Powder Blue
Balloon - Poppy, Berry Read and Blender.
Streamers and Umbilical Cord - Crimson. 


Tuesday 11 June 2013

My Messy Bessy Colouring. :)

Thought I'd have a go at some more colouring. This time all I had was the names of the Colours to use for the dress so no tutorial to follow and I had a play with some purples to do the hair.

So here is my coloured Messy Bessy By Sheri Baldy Stamps and you can purchase her here.

Sorry photo isn't all that great, It has gone all gloomy outside so the lighting isn't great. Think I still need to practice hair as though the colours I picked seemed to work I think I need to get the hang of shading better. 

For the Dress I used - Petrol Blue, Marine and Turquoise.

For the Hair - Aubergine, Plum and Purple.

The Flower and Shoes I used - Carmine, Magenta, Mulberry and Bright Green. 

For the Lips - Ruby

And Last of all the Skin I used - Ivory, Blush, Almond and Pastel Pink. 


Sunday 9 June 2013

Saturated Canary Rose Red Colouring :)

I had such fun the other day with the Lady in Red Challenge that I decided to have a look through some more of Donna's Tutorials and Colour Combos. I decided to have a go with Blue shading, Brown hair and A different Colour skin combo than I usually use. 

For the Blue Dress I used -  Sky Blue, Artic Blue and Powder Blue.

The Bodice - French Navy, Cobalt Blue and Powder Blue.

The Hair - Oatmeal, Ginger, Spice, Terracotter and Chesnut.

The Skin - Ivory, Blush, Almond and Pastel Pink.

And for the lips I used Salmon Pink and the Eyes I used Cool Aqua.

Would love to know what people think and any advice on how I can improve my colouring will be most welcomed. 

Friday 7 June 2013

Something A Little Different for a change. :)

Just a quick post from me, It's my entry to the June Challenge over at Donna-Marie's Cards and Promarker Tutorials over on Facebook. The Challenge is called "Lady in Red". Basically you can use any lady Digi, but her clothes have to be coloured Red.The judge will be looking for the best blending and dimension possible. And Entries are to be in by Sunday the 30th June and the competition will be judged the day after. 
There are some fantastic Picture Tutorials by Donna over there, so If you fancy having a go at the challenge or just learn more on how to use your Promarkers then head on over and check the group out. 

I used two of the tutorials over there to colour this Digi stamp by Simply Betty called My Funky Valentine. 

For the Red Clothes and Umbrella I used Burgundy, Berry Red, Red and Lipstick Red and then for the Hair I used Buttercup, Tulip Yellow and Mustard. 

For the skin I used my usual combo - Ivory, Dusky Pink and Blush. 
The Chocolate Box I used Aegean and Gold.

And last of all the feathers and Buttons I used Mulberry. 

Hope you like her and would love feed back. I really enjoyed spending the day colouring her as it made a change from all the Art Journal Pages I have been working on recently. 

Thursday 6 June 2013

Forth Art Journal Page :)

When I came across this quote the other day "Take a deep breath, its just a BAD DAY not a BAD LIFE " I knew it was one I wanted to use in my Journal and seemed fitting to use when I started My page yesterday as I was feeling grumpy and fed up, though it was a perfect sunny day. 

Here is my completed page. I started off by printing a Digital Stamp from a kit called Block Party Stamps by  Ziggle Designs by Kami form Scrap Orchard, Which was another freebie I downloaded ages ago. I printed one of the stamps on to A4 paper and stuck onto my double spread. I then used some Blue ink and a Imagination crafts stencil template called Butterfly Blossom Border to create little flowers in the back ground. For the Quote I used Black Foam letters and added some white paint to make the quote stand out.


I then used a template by Crafters Workshop called Mini Bricks and some Texture paste mixed with Red and Black Acrylic paint to create a brick border on the left and right sides of the page. Once my Characters were stuck in place I stamped some Clouds and used some Black Paint and Texture paste to create rain clouds and then added gold droplet rhinestones as they showed up better as raindrops. I also added some leaves and flowers too. 

I decided to use The mouse and Hedgehog stamp from the Country Companions Stamps I had and so stamped them and coloured them in using Promarkers. For the Mouse I used Sandstone, Ginger, Pale Pink and Arctic Blue. 


And for the Hedgehog I used Bright Green, Cocoa, Raw Sienna and Sandstone. I made a mistake with him when it came to sticking though and that was using my paintbrush that I had used for lightening up some of the background paper with Gesso, so the image went a bit pale so after the Gel Medium dried I tried going over some of the areas again with the same colours and a Black Glaze Sukura Peen and it seemed to do the trick. 

Wednesday 5 June 2013

Third Art Journal Page

 I Started on Monday on another Art Journal Page and just completed it. Inspiration came from seeing Vicky Papaioannou's recent page called Bloom.   


Here is my completed Page. When seeing her flowers I realised I had some flower stamps that I had in my stash that I hadn't used by Dawn Bibby Designs - Leaves, Flowers and the second pack Trees, but this was where my whole original idea for my page started to go off track and I was getting really interested in where my page was going to head.


As whilst looking for the flower stamps I came across some bird stamps by Fiskars called For The Birds, that didn't go with the flowers but it had a quote I liked the idea of using. "A Bird doesn't sing because it has an answer it sings because it has a song" by Maya Angelou. I used a clear stamp set called Roman Alphabet by Dovecraft for the letters and stamped with Tuxedo Black Momento Ink, but it didn't show up as black as I had hoped, so I went over each of the letters with a Pitt Artist Black Pen which though it showed up a little more I ended up going over again this time with a Black Sukura Glaze Pen which I'm now happy with. 

Then it came to me that I had a digital stamp of some birds which I thought would work, I can't remember where I got it from they have been in my Digital folder for quite some time, But think it may have been a freebie, I coloured them in with Promarkers - Mulberry, Mandarin and Bright Green. And used a Sticky Foam squares to the wings to give dimension. 


and then found some digital music note paper that I liked and thought would go with the theme so printed out that too. Which is where I started putting the actual pages together. I printed the paper out and stuck it to the pages and then went over with Orange and Yellow inks by Papermania. I then used Some Texture Paste mixed with Blue paint over  the flower part of the Dylusions Stencil Called Dotted Flowers and Used some blue ink to stamp through some of the dots. For the Flowers I stamped them, cut them out and coloured in with Promarkers - Azure Blue, Mandarin, Magenta, Cool Aqua and for the leaves I used Bright Green and Lush Green. I also hand drew little music notes dotted around the page once all the bits were stuck in place.